
 English
 ខ្មែរ
ខ្មែរ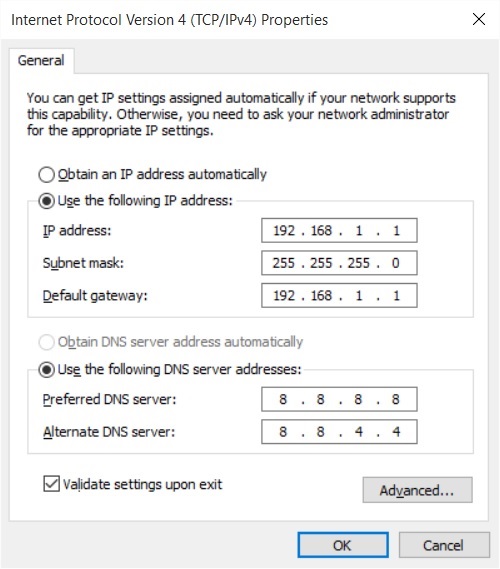
Use these steps to assign a static IP address configuration to an Ethernet (wired) adapter:
- Open Settings.
- Click on Network & Internet.
- Click on Ethernet.
- Click on the current connection.

- Under “IP settings,” click the Edit button.

- Using the drop-down menu, select the Manual option.

- Turn on the IPv4 toggle switch.

- Set the static IP address.
- Set the Subnet prefix length (subnet mask). If your subnet mask is 255.255.255.0, then the subnet prefix length in bits is 24.
- Set the Default Gateway address.
- Set the Preferred DNS address.
- Set the Alternate DNS address (if applicable).
- Click the Save button.

After you complete the steps, you can test your settings using your web browser to try opening a website.
Whatever the method you use, it’s recommended to assign an IP address within the network range and outside of the DHCP server scope to allow proper connectivity and avoid address conflicts, as if two devices share the same IP address neither of them will be able to connect to the internet.